5 – Cutting the Ramp & Flue
Finally! Finally we get to the part where we do some cutting!
Edge Cuts
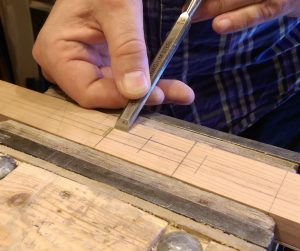
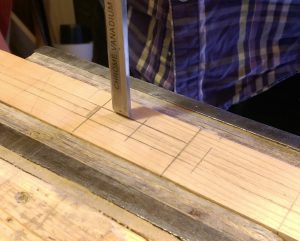
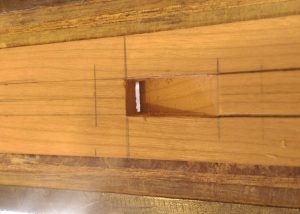
Clamp the front half of the blank into the vice, with the outside uppermost. Place your 10mm chisel (flat side towards you) at the south end of the “box” – accurately – so that the blade lies along the line, running North from the “North end of the Bore” line, up the flue-edge line. Tilt the chisel back towards you so that you can see the cutting edge on the line, and butted right up to the “Bore-North” line. Bring the chisel to the vertical, and tap twice lightly with your mallet (the blade should cut downwards less than a mm). Move up the line and repeat; re-drawing the line with the chisel blade – until you get to the line at the North end of the “box”. (As you pass the short line at 25mm, you can cut deeper by tapping more vigourously).
What this achieves is an edge which will be straight and won’t allow slivers to peel when you’re cutting the ramp. Repeat this all the way around the box, remembering not to cut the edge too deeply, South of the 25mm line. Extend the edge cut past the “North of the Bore” line by one chisel width – being even more careful about depth. The cutting edge needs to be at a depth half that of the flue (which is less than 1mm). Once you’ve gone all the way around, you can straighten the line a little, by lightly placing the chisel into the cut, and tapping it sideways down the cut with the mallet. This will clean up any minor deviations.
Ramp
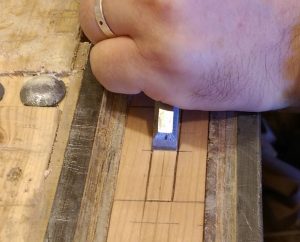
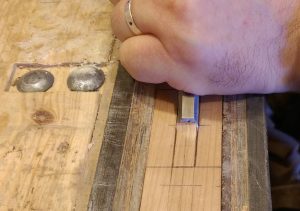
The edge-work done, you should now place the chisel, flat edge to the North, across the North edge, in your edge cut. Bring it to the vertical, and cut straight downwards a couple of mm. Don’t be too vigourous; you will compress the grain and end up with gaps in the cut surface. This done, place your chisel blade along the 25mm line, flat edge down, at an angle of about 25-30° from horizontal. Push gently with your control hand to make a slight cut in the surface; adjust and re-adjust so that the cut is STRAIGHT across the flute, in line with the 25mm line.
Step back , and keeping the chisel exactly parallel with the blank, tap the chisel to cut downwards into the surface until you reach the North edge cut. Repeat this cut, deeper and deeper at the North, until you have a ramp. Make sure you repeat the Northern edge-cut as you get deeper, this will keep the Northern edge of the hole you’re cutting vertical and smooth-ish. When you get to a certain point, you will break through into the SAC – obviously at this point you can stop doing the Northern edge; but now you have to take care as your chisel cuts “off the end” to avoid splintering and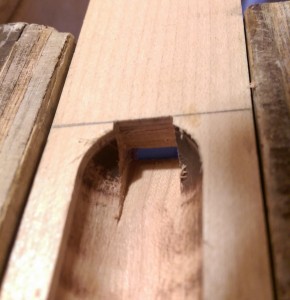 splitting. Now, as you get deeper,
 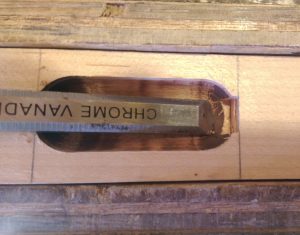 start taking the blank out often, to check for a sharp edge at the bottom of the ramp. Once you have that, stop. Now, look through the hole you’ve made from lots of angles, and make sure it’s square and there are no odd angles. The ramp can be curved along the length, so long as it’s the same depth left-to-right (i.e. not slanted across). Use a 10mm-wide file to “clean up” the ramp surface. Now place the two halves of the flute together, line up, and check that the sharp ramp-edge coincides with the edge of the SAC; clamp and file to correct if the ramp falls short, or the SAC edge needs to flatten to meet up properly.
Now turn the front half of the blank upside-down into the vice; and cut another ramp inside the SAC roof, down to the Northern edge. Don’t make a super-sharp edge here; just a couple of mm deep at the Northern edge of the box is fine. Dimensions of this ramp are not critical – it simply aids smooth airflow.
Flue
If you have a Dremel with a router attachment, now’s the time to break it out. If not, you either need a micro-plane with a 10mm wide blade, 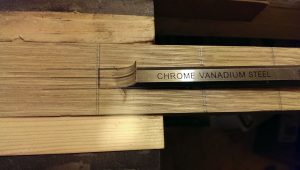 or you need to be extremely good with a chisel. The flue needs to be dead straight-edged, 0.8mm deep (when finished), and super-flat in all dimensions. Any lumps, bumps, slopes or cuts in it will DESTROY sound quality. If you do this with a chisel, don’t use a mallet; either use a small piece of wood, or the heel of your palm – and shave the absolute thinnest you can – constantly checking depth – until you get to 1mm deep. If you end up at 1.2mm deep that’s fine, we can correct with sanding later – but my advice is: don’t. 0.4mm is a lot of sanding. Before you start, cut an “edge line” at the “North of Bore” line to stop you cutting too far. This edge line can be a couple of mm deep, as that’s where the TSH is going.
The very best way I’ve found is to use a Dremel Router… use a 2.5mm or 3.2mm cutting bit, set its depth on a scrap piece of wood, and cut from the ramp end toward the TSH end (North to South). If you use a micro-plane, set its cut as fine as you can and shave off the tiniest slivers of wood until you get to 1mm deep. Use the plane in the OPPOSITE direction to the chisel; from TSH to ramp.
With the flue cut and level- and depth-checks done at lots of places, you can now use a 10mm-wide file to round the transition from ramp to flue; the 1mm-deep portion of flue shouldn’t be less than 20mm long; but there shouldn’t be a step or angle between ramp and flue.
