4 – Marking and Routing
Everyone I ever spoke to about woodwork says the same thing… measure twice, or three times, and cut once. Never was this more important advice than with flutes – most of the dimensions are critical to good sound. So when you mark, double check your marking before making any kind of cut.
Marking Up
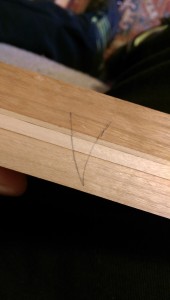
A Letter V across the join….
First thing’s first! Line up your two sticks nice and tight, every which way you can, until you find a nice close fit; if the wood you’re using has strong grain patterns, try to make them line up if you can. (Best if the two pieces came from the same piece of wood). Once you have a fit you like, write a letter “V” across the join in a couple of places. This shows for future reference (a) where they line up, and (b) which is outside and which is inside. Also, decide (purely on looks) which end is going to be “North”, and which side is going to be the front. Mark these too – and remember in future to check these marks before you do anything!!
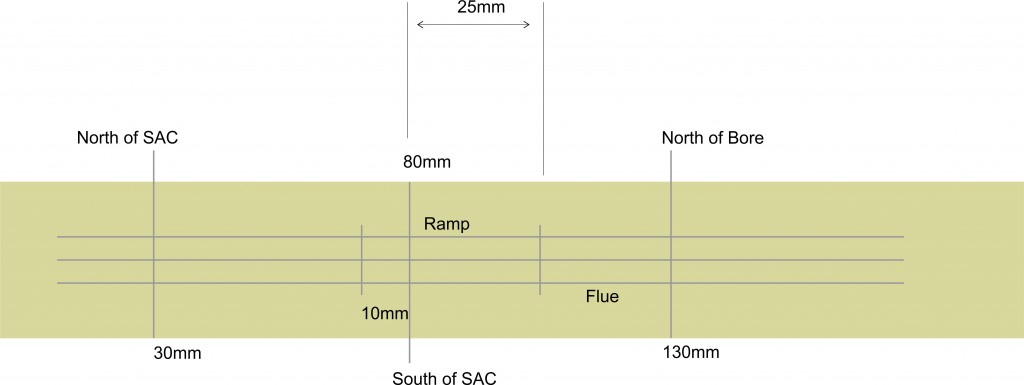
Next, decide how long the blowhole and Slow Air Chamber (SAC) are going to be: I tend to use 25mm to 30mm long for the blowhole, and 40-70mm long for the SAC; as you make more flutes, you can experiment with these dimensions and see what makes the nicest flute both from looks and sound points of view. Let’s choose 30mm blowhole and 50mm SAC for this flute. Take a nice accurate steel rule, and mark a short “-” across the outer front of the flute at 30mm from the “North” end, and 80mm from the North end. Then make another “-” at 130mm. Do the same on the rear piece. Now take your T-Square, set for 90°, and draw lines all the way around both pieces at each mark. Measure and make sure your lines are at 30, 80 and 130mm from the end of the blank. These will guide you in routing.
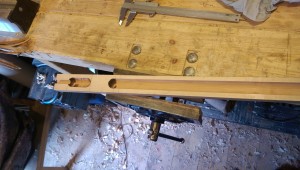
Now you need to decide if the bore and SAC will be “hand hewn”. If so, you need to mark lines on the inside faces of your blank where the edges of your cutting will be: the wood is 34mm across, and your bore and SAC should be 19mm wide, so your lines should be 7.5mm from the edges of the wood, from North end to the South end. If you’re using a table-mounted router, you simply need to set the table and fence such that the centre of the 19mm dome cutter is in the centre of the blank. I also advise marking guide lines on the back of the fence, at the left and right edges of the cutter – these will show where to stop cutting.
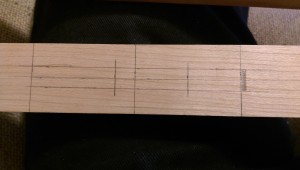
Now, you need to mark the outside front of the flute for the ramp, flue, and true sound hole. First measure the left/right centre of the front face at two or three places down the North-most 200mm of the flute. Now line up your rule with these marks, and draw the centreline. Now – the ramp and flue need to be roughly 50% as wide as the bore. We have a 10mm chisel, so let’s mark for 10mm. Again, at 2 or 3 places down the first 200mm, make marks both sides of the centreline, 5mm from it. Draw lines (these must be parallel with the centreline and the edges). You should now have a “box” drawn between the line at the south end of the SAC and the one at the north end of the bore. Your True Sound Hole (TSH) will be off the south end of this box. Measuring 25mm South from the North end of the box, draw a line with your T-Square across the box. Also mark a short crossing line 10mm NORTH of the SAC line. Here is the marking you should end up with on the front face:
Routing
If you’re using a table-mounted Router, you’ll need to make several passes at increasing depths with hardwood – unless you want to pay half the price of a new flute for a new cutter every time you make one! For a 19mm bore we’re looking for a depth absolutely no less than 9mm and as close to 9.5mm as you can. As you get close, use your Vernier depth gauge to check. I am assuming you are familiar with routing and have taken all the relevant safety precautions; a router cutter is turning at 30,000rpm and won’t even slow down while cutting through skin and bone. It is a nasty, messy way to lose body parts so BE SAFE.
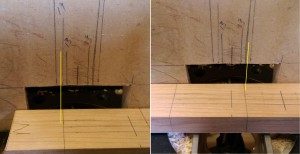
Line up the North end line of the SAC on your blank with the left hand cutter edge line on your router fence, and lower the wood carefully onto the cutter.
Once settled, feed the blank steadily to bring the South end of the SAC into line with the RIGHT hand cutter edge mark on the fence. Lift the blank off the cutter from the south end and once clear of the cutter pull it toward you. Now, turn the blank around and feed the South end of the flute onto the cutter from the right; and steadily keep feeding until your “Bore North End” line is in line with the cutter centre (or maybe a couple of mm past). Do the same with both blanks, then shut down the router, increase cutter depth by a couple of mm, and repeat. Keep doing this until you reach 9.5mm in depth.

