10 – Cutting a Block
I’m putting this next simply because the shape and construction of the bird can make a huge difference to the sound and tuning of the flute… so until we have the flute’s final block, we can’t effectively tune it!
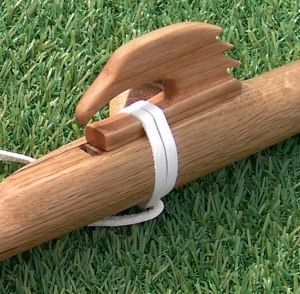
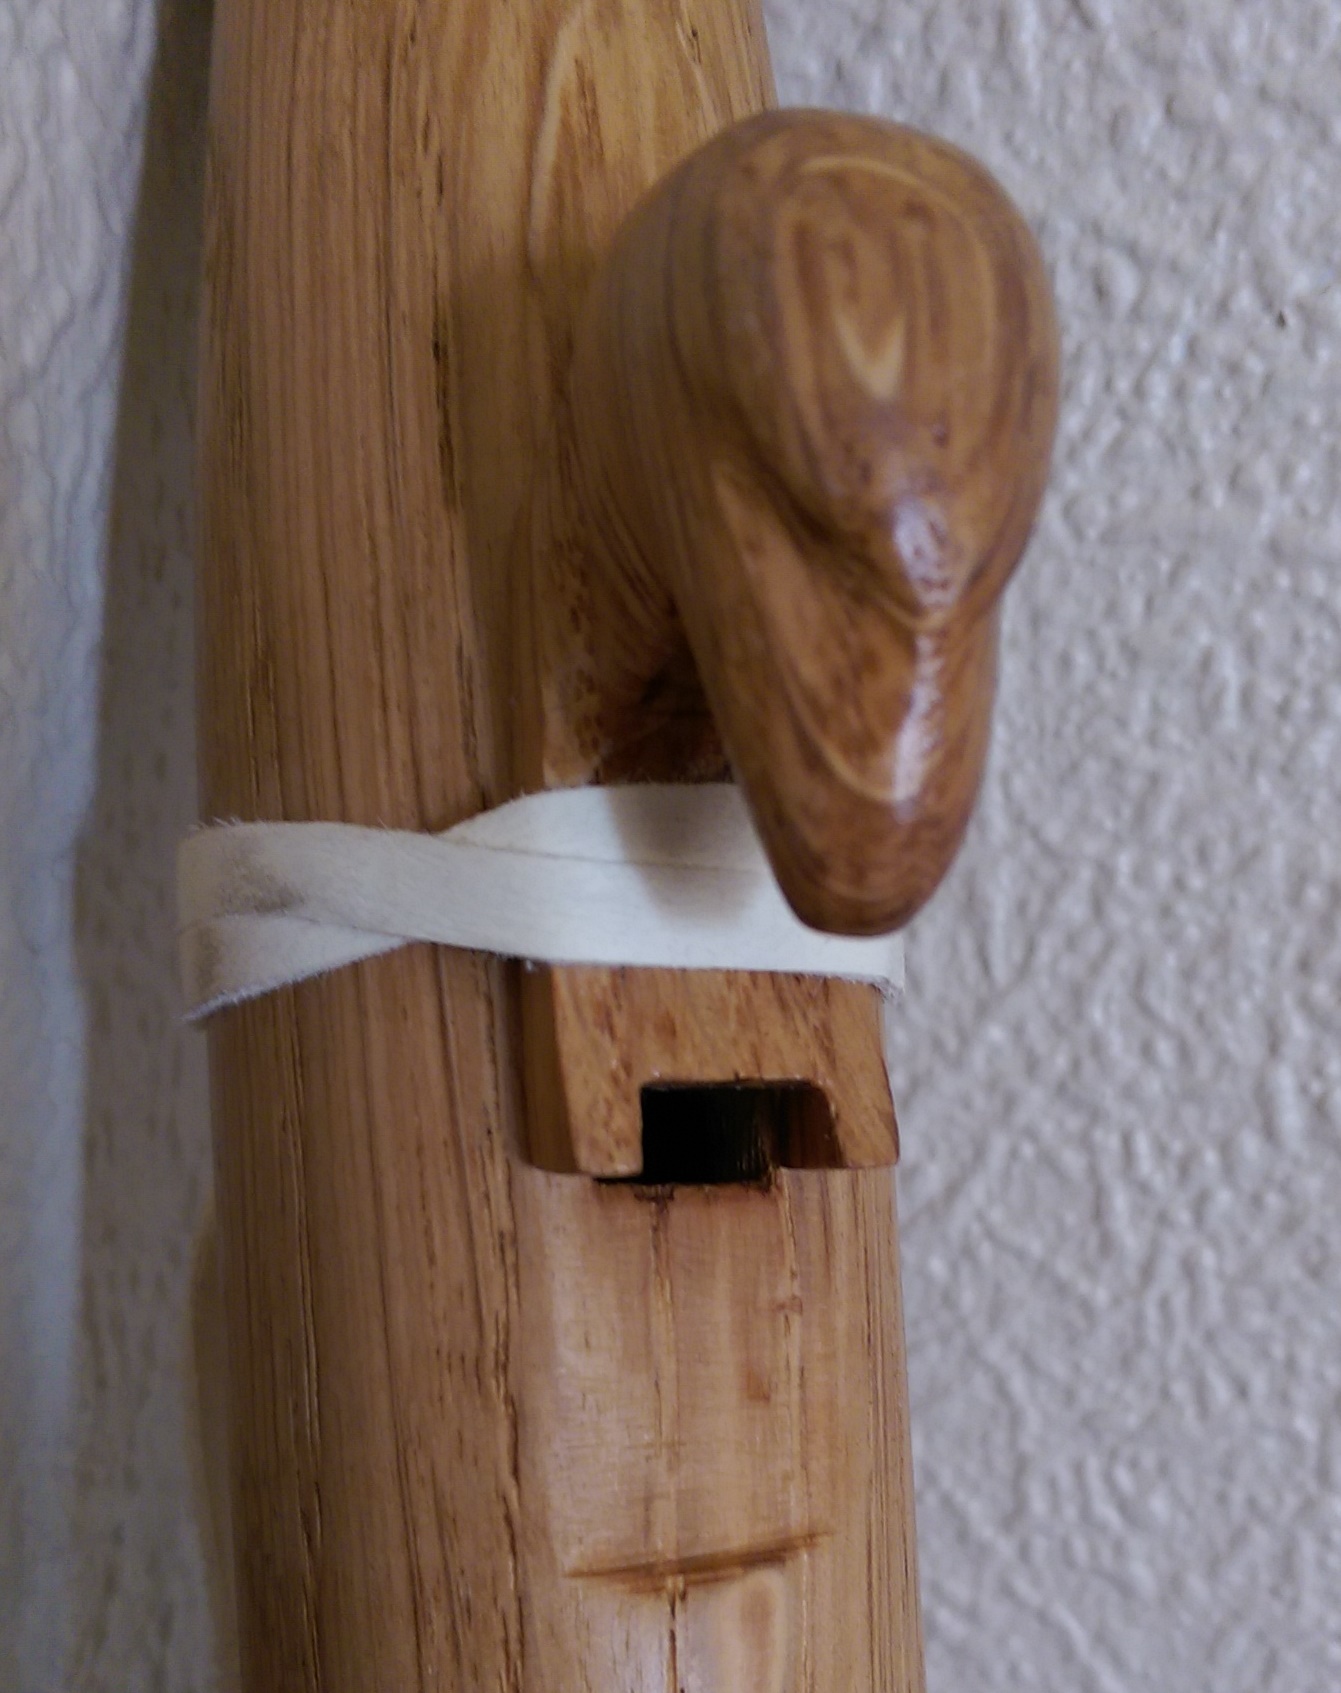
But – here you’re only really limited by your imagination and one small rule; NO LEAKS! The block must cover the entire ramp and flue area and must allow air to exit cleanly from the flue onto the cutting edge; and the edge at the South end must be straight across the flute – no curves or angles. The base must be completely flat and as smooth as is humanly possible; oiled to prevent swelling. You already sanded the Nest within an inch of its life and it’ll be oiled or waxed before your flute is done; so the seal will be good. With the measurements of the flute as given in the series so far, your distance from the North end of the ramp opening to the South end of the flue should be 50mm (2″) and so the base of the Bird should be at least 55mm to make sure of a good seal at the North end. The flue/ramp are 10mm wide, so the base should be as an absolute minimum 14mm wide: about 9/16″ – I would suggest that closer to 16mm (5/8″) should be your minimum. It just so happens that the wood we used to make the flute blank was 17mm – why not use an offcut of that? You can either use the same wood the flute was made from, or a different wood to provide a contrast.
After that, as I said, you’re only limited by your imagination… you can use carving techniques, if you’re good at that; you can use saws, bandsaws, dremels, f iles, knives etc etc etc to cut and shape the top; just as long as the integrity of the base (and particularly the bottom South 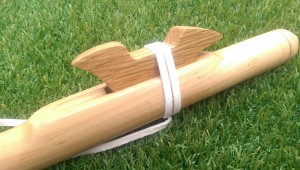 edge) is maintained.
Some information you do need, however, is that the shape of the block at the South end can affect your note. An overhang over the TSH will lower the note; too low an overhang and the flute won’t play at all. The North end of the bird should not in my opinion be any less than 30° from the flat of the nest; preferably closer to 45 or 60°. I often use a curved undersurface which will allow the lower angles. Another thing is to make something called a “Chimney” – which is where the sides of the block extend along the edges of the TSH and shield the sides. This will also lower the note, and some also feel that it improves sound quality (this will depend entirely on your flute’s construction). Remember that these few simple things can be used as tricks to bring a flute down to the correct note if tuning goes completely wrong and the note is a little too high.
A block with a “Chimney”
For ideas of block designs which are within your capabilities, look at other flute makers online; as your skill builds you will end up being able to attempt more ambitious shapes. Many of my blocks have been very simplistic designs although I’m having more ideas now as I learn how to work the wood. Knife carving is something I never yet tried so that’s in my future! Have a look at Dipping Duck and Smoke Eagle for my favourite (and most elaborate) designs so far; trust me when I say they get a LOT more elaborate than those in the wider flute-making world!
Once your design is complete, sand sand and sand – as much or as little as you’d like – so that the surface has the finish you want; sand the base down to at least 600 grit – maybe also use the 0000 grade wire wool. Sand the base by placing the paper flat onto a surface like the bandsaw top or a very flat table; hold the block in your hands and run it backwards and forwards over the paper.
Once you have the finish right, use the block for tuning… you can apply a final finish to it later.