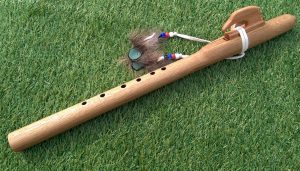
7 – Testing, Shaping and Final Key Selection.
Remove From the Clamps and Test
Loosen your clamp from the centre outwards if possible (depends on how you’ve clamped). Do it nice and slowly and listen for any telltale “click” sounds from the joint (there should not be any). If you’re using a clamp like mine, then slide the flute carefully out from between the leaves of the clamp. If you have already made the blowhole with a router, skip to testing: if not, mark an “X” on the blowhole end by drawing a line from corner to corner in both directions; and then use a bradawl to punch a starter hole bang in the centre where the join and your X meet.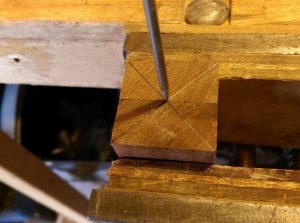 Then drill perfectly vertically into the flute end with a 5mm drill until you break into the Slow Air Chamber; use the minimum pressure possible to avoid internal splintering. You can use a micro-spirit level to level your flute and drill, or you can use a drill press to ensure vertical. Then – use an 8mm bit to enlarge this hole to its full size. (You can go up to 10 if you want; I prefer 8).
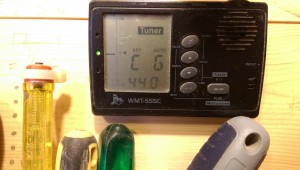
Now – either use the bird from another flute, or a suitable length piece of flute blank (about 60mm long), and place it as if it was a block; blow your flute and listen to the note you get; try different strengths of blow to see what it does. (Stop, then start with a new strength – once it’s resonating it will happily accept blow pressure changes). If the note is easy to “break” to a new octave, you can gently (I SAID GENTLY) round the exit edge of the flue and the exit edge of the bird – this should make the note steadier, more solid in tone. Use your tuner to have a look what note you’re getting; mine generally blow an “E” to start with. (With a 19mm bore this isn’t sustainable – the Northernmost one or even two holes won’t work, and the holes would be too far apart to reach anyway).
Shaping
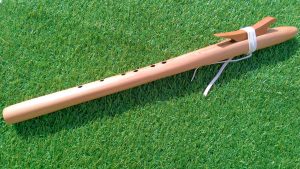
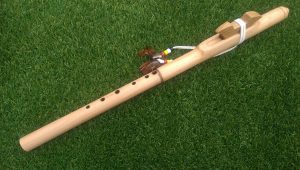
Forest Hawk – shaped with a spoke-shave plane.
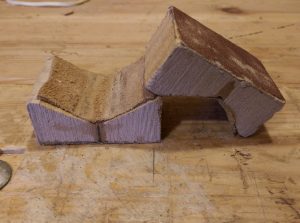
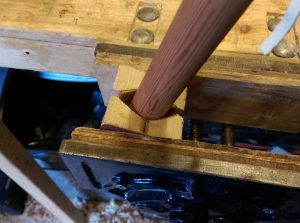
I use two main methods of shaping; spoke shave plane and lathe. The spoke shave is less accurate, and gives a less perfectly circular bore than the lathe; and also results in a less “machined” looking Northern end. See the picture of “Forest Hawk” to get an idea of the results I can get this way. (I sometimes take the corners off with a rasp, first – it’s more rapid but harder work). It’s a lot of very hard work; you place your flat-based spoke shave against the vice-clamped flute and draw upwards towards you. (By the way – you must make yourself a pair of vice clamps – two pieces of pine, 2″ x 1.5″ x 1″. Cut a nice even “V” into the upper surface, aligned with the short dimension of the wood. Get some good thick treated bull-hide and glue into the V to line it. Glue some sandpaper onto the back. Use these to clamp your flute in the vice so that pressure comes from several directions and doesn’t stress the walls or the glue).
To use the lathe, have a centre at both ends; the driven centre into the blowhole and the live centre into the end of the bore. Use a good, high quality masking tape at the bore end to prevent splitting; and also at either end of the “nest” (the place where the ramp, flue and true sound hole are cut) so that you know where you’re cutting to. I’m going to assume you’re comfortable working with a lathe and know the relevant safety precautions etc; not really in scope of this blog to teach you that! You’ll need a range of suitable cutting tools. Round the flute bore from the tape at the South end, to the tape just south of the TSH. Then do the same at the blowing end, either tapering down to the blowhole or doing a different design as you see fit; See below the results of my styling decisions when using a lathe…
Key Selection
Now that the initial shaping is done, and the sticks now resemble an actual flute, you need to choose the key in which it will play. Tie your spare bird onto your flute, and position so that it blows nicely. We’ve chosen 19mm “G” already but normally of course you’d have a decision to make now; and it’s purely personal. Having chosen “G”, we need to cut our flute down. Cut off half an inch, and see what it blows; repeat until you get to just above F#. Now start cutting off smaller lengths; 5mm or less. Every time you cut, use sandpaper to clean up the splinters in and around the end, and also blow into the bore-end HARD to get any sawdust out. Then blow the flute; hard, soft, intermediate. Use your tuner to check the note. You need to stop ten “cents” below your chosen note; because if you go past it, you can’t easily fix it; but when you’re finer-tuning later you can always cut or file more off to bring it upwards towards perfect.