6 – Cutting the True Sound Hole; and gluing up.
OK now it starts to get finicky, and you have the maximum potential for making a stick with holes in, as opposed to a flute. At every stage here you have to be ultra careful and use gentle taps on chisels, cut little and often, and line up twice, cut once.
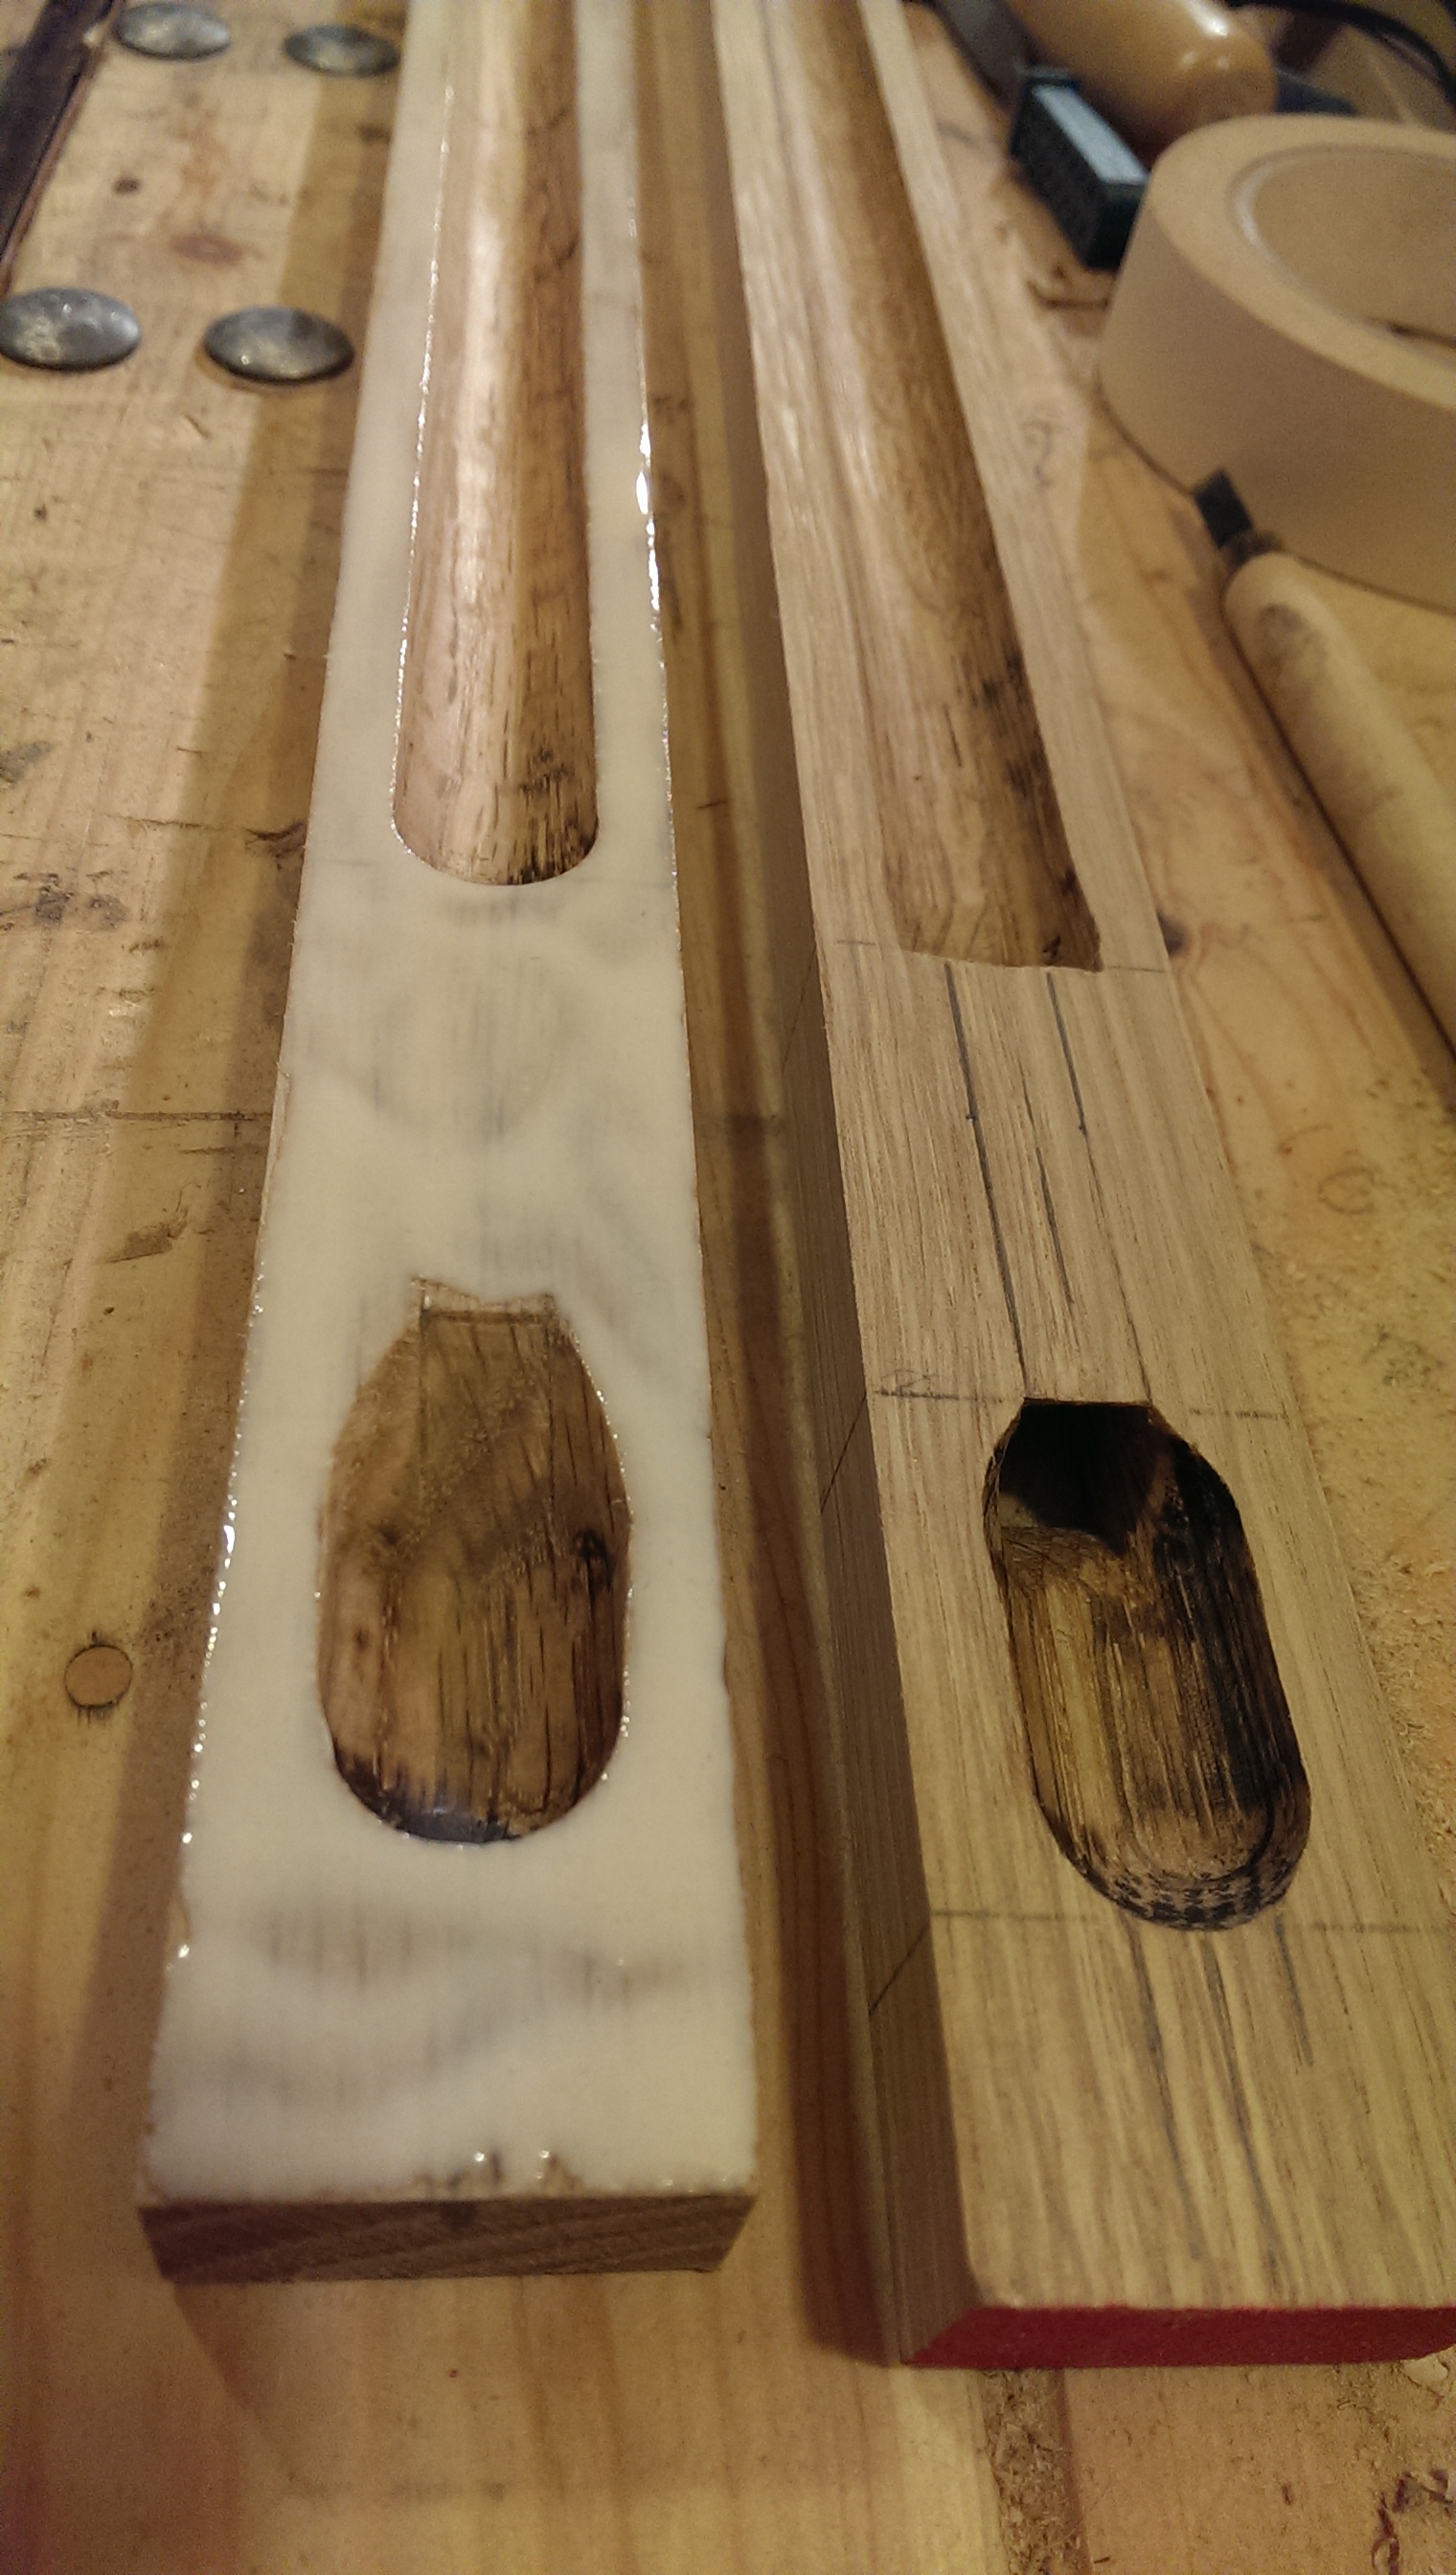
From the Outside


Line the chisel up, at the South end of the flue, flat face Northmost, across the flute. Lift to vertical, and tap downwards; deepening your edge cut at the south end of the flue. Once you have it a couple of mm deep, switch the chisel around to the opposite direction, about 2mm South of the edge cut, and angled about 30° downwards into the surface. Cut to make a kind of “italic V” shaped cut and chop out a small “toblerone-shaped” piece from the TSH. Repeat this until the TSH is a couple of mm deep and you can’t really angle the chisel properly any more. You should have a rectangular notch, 10mm wide and 2mm long, and about 2mm deep.
From the Inside
Measure the distance of the left and right edges of the flue from the outer edges of the flute. Turn the flute upside down, and mark (remembering to swap sides) those edges from the INSIDE of the bore. Now, do the same as from the outside, above; starting on the “North of Bore” line with a deep edge cut, and cutting a toblerone-shaped piece lined up with the edge lines you just marked. Deepen this until it’s about 2mm deep as before. Now, edge-cut the edge lines you marked, about 20-25mm back from the North of Bore line – nice and straight. Now cut an ever deepening ramp (30-45° – 30° for a sharper sound; 45° for a softer) down to the North of Bore line, cutting the North edge line deeper, until eventually you start to see daylight through the TSH. Care cannot be stressed enough at this point. Use pushing on the chisel to cut – your chisel must be ultra-sharp. Cut the base of this internal ramp to form the cutting edge from underneath; make the cutting edge (just at the moment) about 2-3mm back from the North of Bore line.
Back Outside Again
Turn the flute over. Clean up the cutting edge with a very fine file, or even fine (400 grit) sandpaper. Now, again use your chisel to shave half a mm off in depth, from about 8mm South of the cutting edge. Half a mm, NO MORE. If you’re not confident with your chisel to this accuracy, use a fine file and make a slope down to the cutting edge; use your vernier depth gauge to check depth and level OFTEN and make that cutting edge razor sharp and exactly half flue depth.
Now, use a very fine file to blunt the cutting edge a little, and move the edge back until it’s about 3-5mm back from the south edge of the flue. When I say “blunt it a little” I mean enough so it’s not razor sharp; not enough to be able to discern a thickness with the naked eye. Use this opportunity to square the cutting edge exactly parallel with the Southern edge of the flue, and to straighten that edge, too. Use the same file to ensure the ramp inside the flute is level (left-right) and doesn’t have bulges in it. These steps have a BIG impact on sound quality; the result should be perfectly parallel North and South edges on the TSH, a cutting edge which is the same thickness its entire length, and an inner ramp which is not sloped left to right and doesn’t have any surface irregularities.
Oiling, Gluing
Now, get a thick, quality, round artist’s painting brush, and paint oil (I like walnut oil plus it’s cheap!) onto the inside of the bore, SAC, ramps, flue and cutting edge top and bottom. Avoid touching the gluing surfaces with oil like the plague; oil destroys adhesion and causes leaks. Leaks destroy sound.
Let the oil dry – at room temperature about an hour max.
Lay a bead of glue onto each inner mating surface of the blank on either the rear or front half; then use a finger or a glue-spreader to make an even coating over the whole mating surface. (I use Titebond III glue – it’s utterly brilliant). Now place the other half of the flute on top and without pressing slide it into position roughly.
For a gluing-clamp, I use two strips of 10mm plywood, 6″ wide, with bolts through, 1″ wide washers top and bottom, and butterfly nuts on one side to tighten. I slide the assembled blank into the clamp from one end, fine-position the halves – ensure the inner edges of the bore line up at the bottom, and make sure your end lines up properly at the Northern end. Then tighten the butterfly nuts, finger tight. There should be drips of glue, oozing out the sides of the join, when you have the pressure right. If you over-tighten, the joint will be starved of glue and won’t stick well; if you under-tighten, the glue will be too thick and will be a weak point. “Pretty tight by finger action” is as close as I can come to quantifying it. Stand the clamp up with the flute in it and leave to dry for AT LEAST 24 hours; 48 hours to 3 days in colder climes.
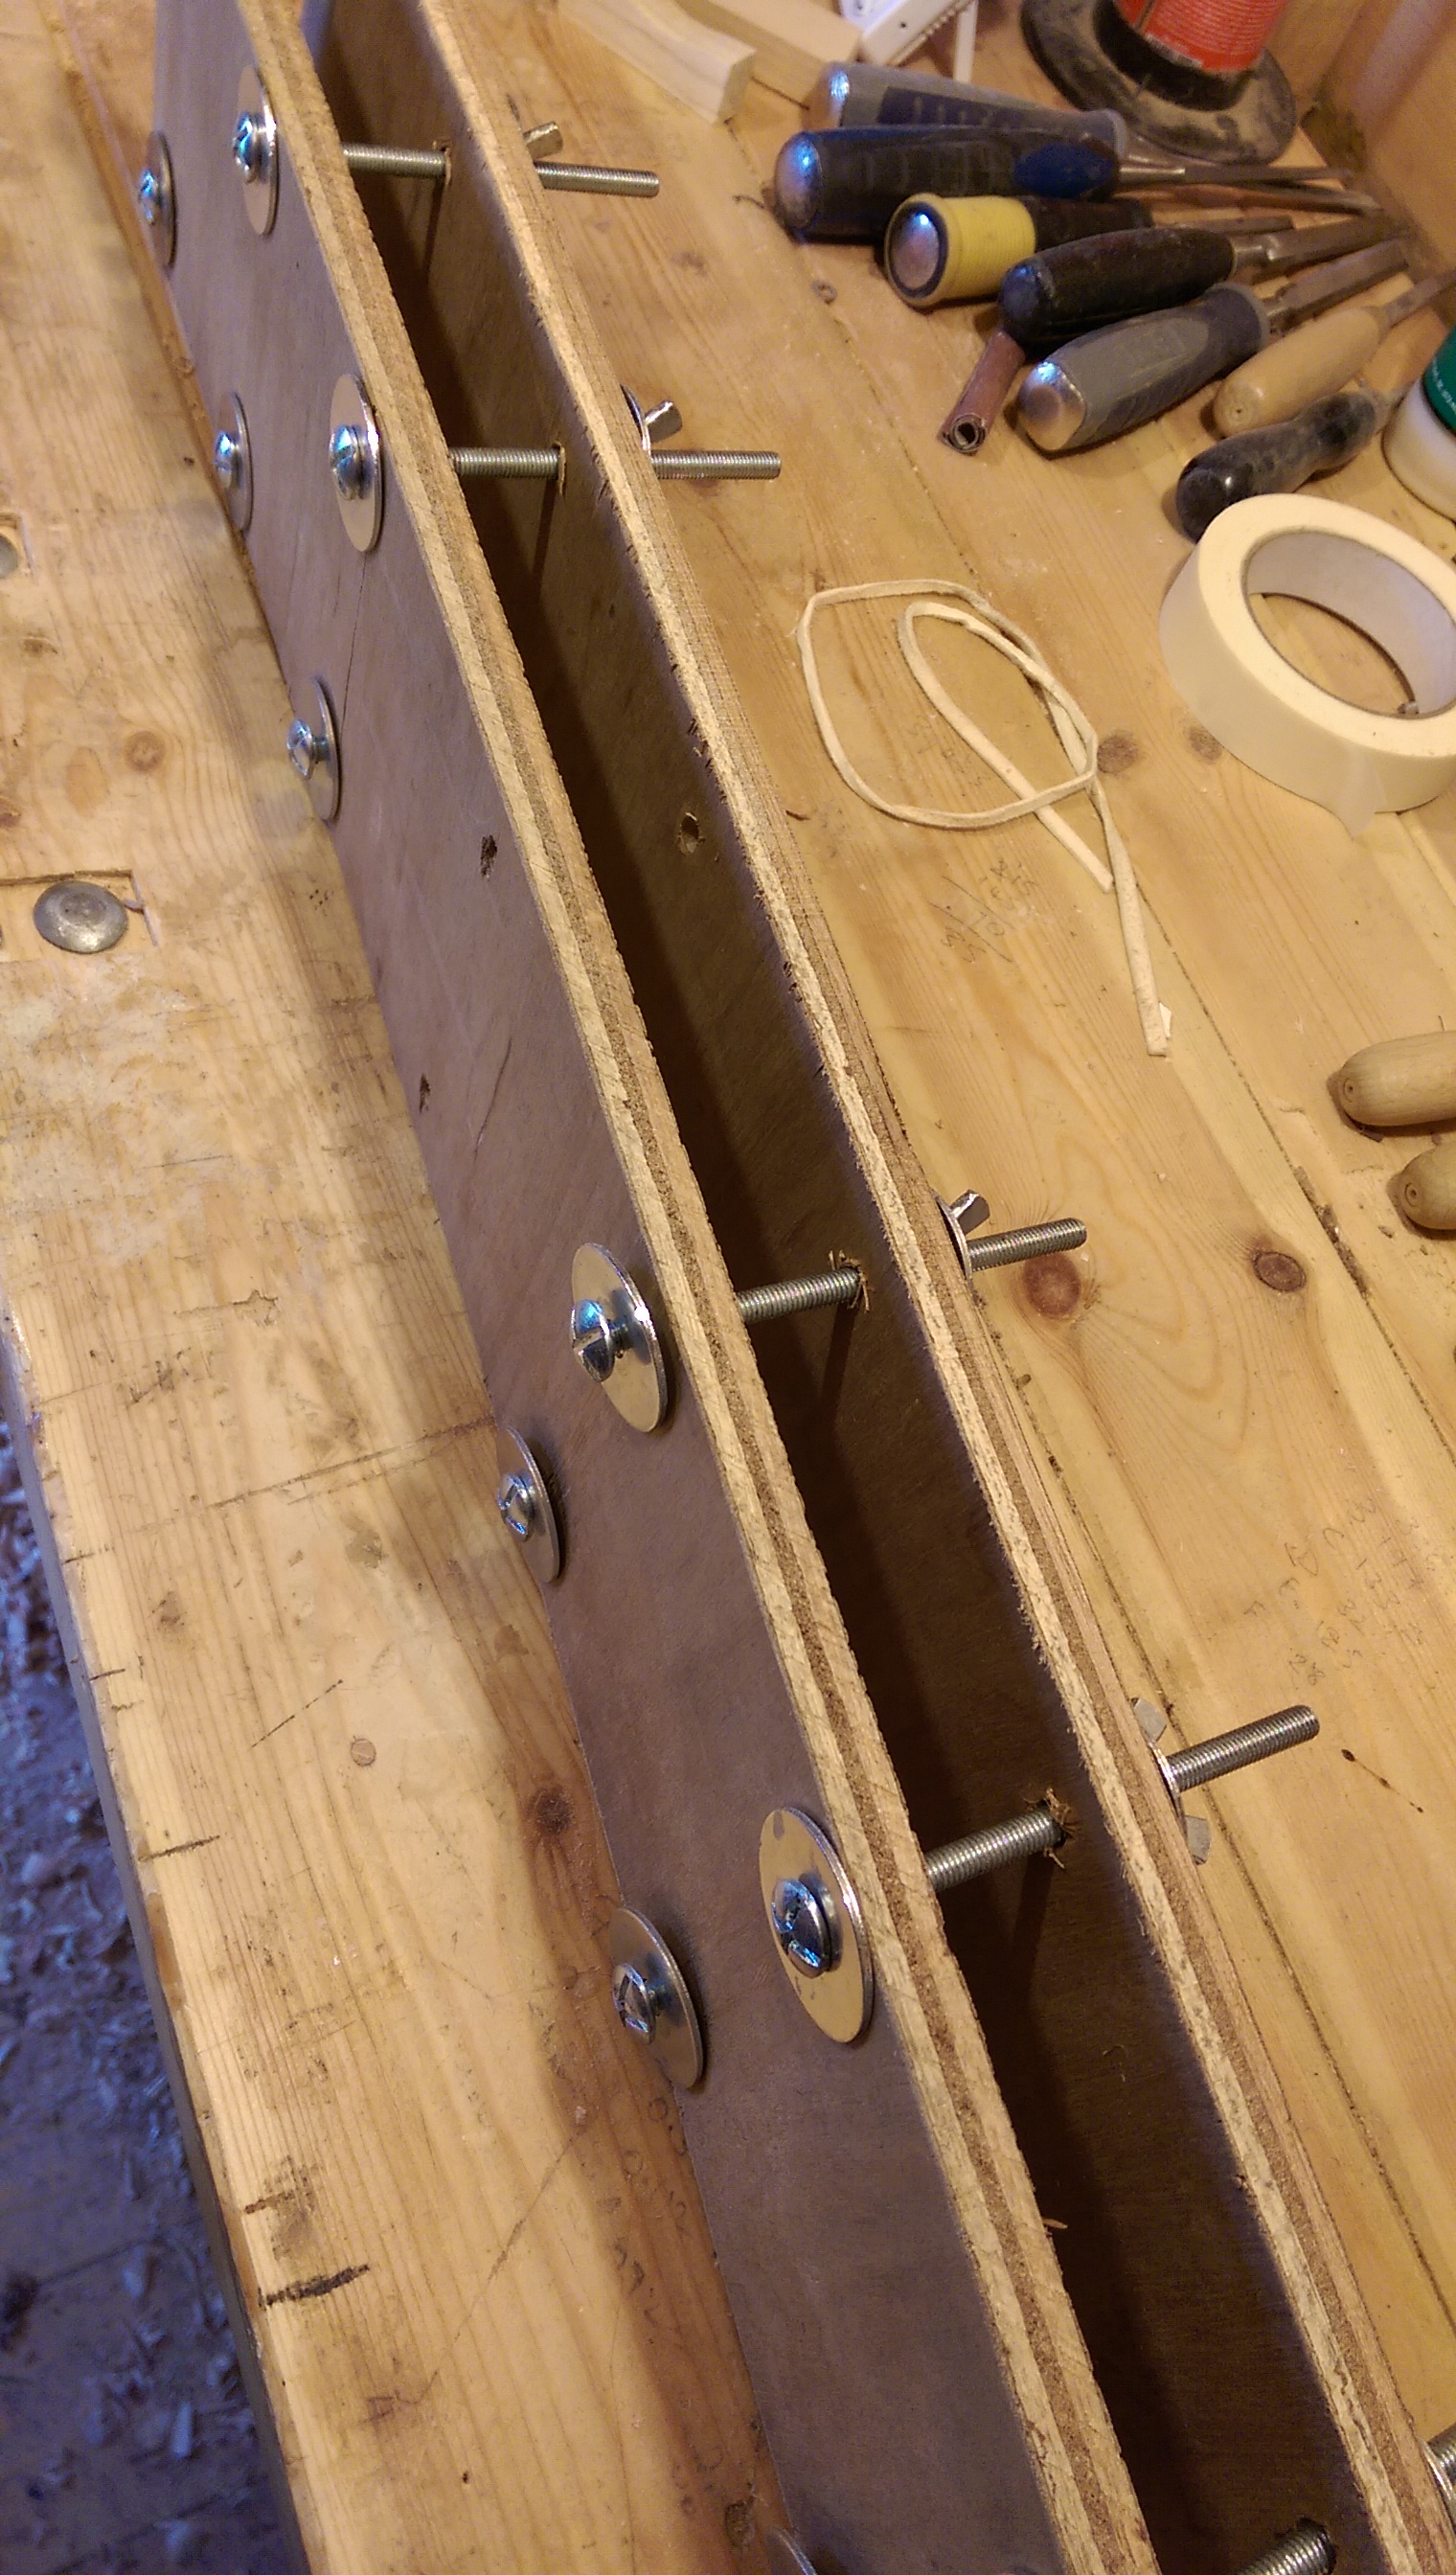
Home made gluing clamp